Before we start with Azure Sentinel, let’s understand SIEM and SOAR first.
What is SIEM?
A security information and event
management (SIEM) are a solution that collect security data from your entire
organizational infrastructure such as host systems, applications, networks, security
devices etc.
SIEM solution helps to:
·
Analyze data for potential threats
·
Detect and stop attacks
·
Leverage machine learning techniques to use data
gathered from previous events to improve threat prediction.
What is SOAR?
A security orchestration and
automated response (SOAR) is a solution that helps SOC or security team to
respond to alerts based on priority. It helps orchestrate manual
tasks on day-to-day basis.
SOAR solution helps to:
·
Automate response workflows and
·
Automatically respond and take actions against
threats/alerts
Azure Sentinel is a
cloud native, scalable SIEM and SOAR solution. Azure Sentinel can collect and
analyze data from multiple data sources including Azure Cloud tenants, subscriptions,
Office365, and other public cloud service providers, as well as on-premises
environments, making it a single solution across the entire digital estate.
Azure Sentinel provides a bird’s-eye view of the entire
organization’s assets. And it leverages machine learning and artificial intelligence
(AI) techniques for threat analysis and proactive threat hunting.
Advantages of Azure Sentinel:
·
Scalability: Azure Sentinel
scales dynamically to adjust to changes in workload or compliance requirements.
It is built on to support pay-per-GB pricing.
·
Usability: Easy to setup for cloud as well as on-premises workload.
·
Integration: It easily integrates with existing SIEM and SOAR solution,
providing comprehensive view of security across your environment.
·
Cost: On Pay-As-You-Go (PAYG) model, you are charged as low as
$2.60/GB of data analysis.
On top of all these, Microsoft team
is continuously expanding Azure Sentinel’s capabilities making it top cloud
native SIEM solution.
Azure Sentinel Features:
Azure Sentinel comes with the following distinct and prominent
features:

1.
Collect data at scale – Built on
log-analytics, Azure Sentinel comes with amazing scaling capabilities that
allow connectivity to a wide variety of data sources for the collection of
data. This can be from O365, different applications, across all users,
different subscriptions as well as from other clouds. There are connectors
available that can be leveraged to connect to these different data sources.
2.
Detect previously uncovered threats – Azure
Sentinel detects previously uncovered threats and minimizes false positives
using analytics and threat intelligence from Microsoft. It thereby greatly
reduces the effort spent by the security teams in investigating alerts that are
raised but are not real incidents.
3.
Investigate threats with artificial
intelligence – Azure Sentinel uses artificial intelligence for threat
investigation and looks for any suspicious activities at scale. Microsoft
brings over its own cybersecurity experience with Azure Sentinel.
4.
Respond to incidents and events rapidly -
The artificial intelligence (AI) makes Azure Sentinel respond to the threat
incidents and events rapidly. There are many possibilities to hunt for threats
and orchestrate the responses accordingly.
Azure Sentinel Implementation:
To create and
configure Azure Sentinel, we need to create the Azure Log Analytics Workspace
first, as Sentinel is built on top of Azure Log Analytics. After Azure Sentinel
is created and configured, we will use various data connectors as a data source.
To view the log and events data, we will use the built-in
workbooks for viewing sign-in and audit logs and events. Please follow below
steps to create and configure Azure Sentinel:
1.
Create Resource Group
2.
Create and Configure Azure Sentinel
a.
Create Log Analytics workspace for
Azure Sentinel
b.
Create Azure Sentinel
c.
Connect to Data Sources
Let’s start with creating a resource
group in defined Azure subscription
1.
Login
to https://portal.azure.com, go to “Resource Group” and click the “Add”
button.
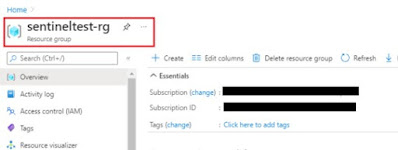
2.
On
the “Create Resource Group” page, choose your subscription, enter the Resource
Group name and select a region
a.
Resource
Group Name: sentineltest-rg
b.
Region:
Southeast Asia
3.
On
to the next page, add Tag details and hit Next
- Click
on Review + Create and after the validation is complete, click on the
Create button
1.1.
Create Log Analytics workspace for
Azure Sentinel
- Login to Azure portal, click All
Services and search for Azure Sentinel
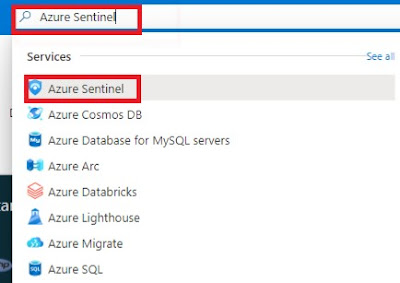
- From the Azure Sentinel page, click on ‘Create’
from the top menu or click on the ‘Create Azure Sentinel’ button.
It will redirect you to the Log Analytics Workspace if the workspace does
not exist for Sentinel.

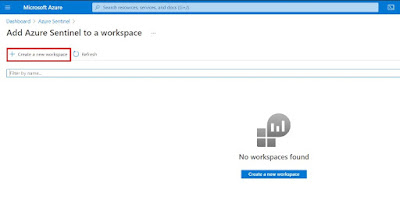
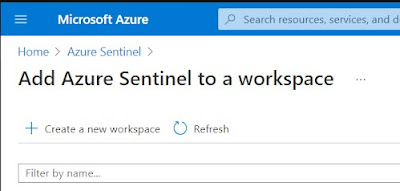
3. From the ‘Add Azure Sentinel to a workspace’
page, click on ‘Create a new workspace’ button
- On the ‘Create Log Analytics Workspace’ page select the
subscription, the resource group,
Provide the name as ‘sentineltest-law’,
Choose the region as ‘Southeast Asia’
- Once that is done, you can leave other options as-is, and then
click on ‘Review + Create’ and finally click on create after the
validation.

1.2.
Create Azure Sentinel
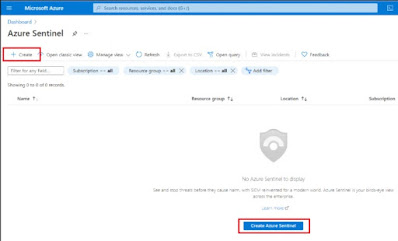
1. Once Log Analytics Workspace is created, you
will be redirected back to the Azure Sentinel page, where you can click on the
‘Create’ button from the top menu or click on the ‘Create Azure
Sentinel’ button at the bottom.
2.
After
clicking on the Create button, you will be redirected to the page to ‘Add
Azure Sentinel to a Workspace’
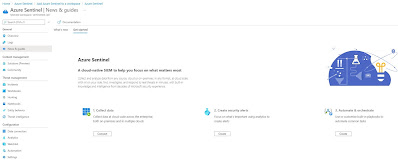
3.
Select
the workspace name, ‘sentineltest-law in this case, and then click on
the Add button. This will add Azure Sentinel to the Log Analytics
workspace. And you will be redirected to the Sentinel’s ‘News and Guides’
page.
1.3.
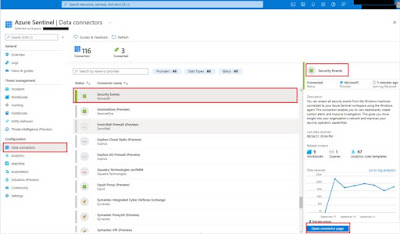
Connect to Data Sources
Azure Sentinel has the ability to connect to a number
of data sources. At present, there are around 116 connectors that allow
connectivity to these different data sources.
·
Data
ingestion from services and apps is done by connecting to the service and
forwarding the events and logs to Azure Sentinel.
·
For
physical and virtual machines, log analytics agent is installed that collects
the logs and forward them to Azure Sentinel.
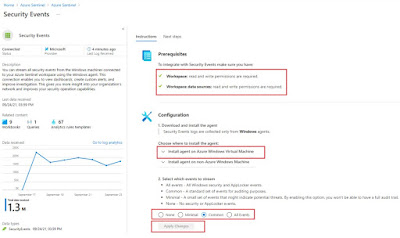
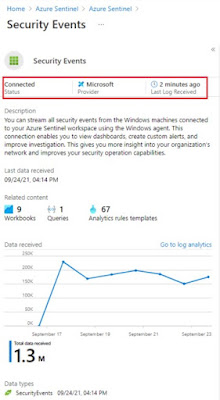
1.3.1. Connect to ‘Security Events’ data connector
To connect to ‘Security Events’ data connector, log analytics
agent needs to be downloaded from log analytics workspace and installed on
respective virtual machine. As soon as agent is installed, we can start seeing
data flowing to Azure Sentinel workspace
Steps
to connect to respective data connector is available under every data connector
page. Please refer to data connector page for more details:
Once the data source is connected, you can
start seeing the observing the logs and events flowing through Sentinel.
2. Analytics
As the core functionality
of an SIEM, the configuration of detection rules is a critical component of
Azure Sentinel deployment. Azure Sentinel includes many built-in alert rules
templates, covering the array of typical log source, with new alert rules added
regularly. Additional rule templates can be obtained through the Azure Sentinel
Community, where both Microsoft and third-party contributors publish new
content. The proposed alert rules are reviewed by the community and those found
valuable published in Azure Sentinel.
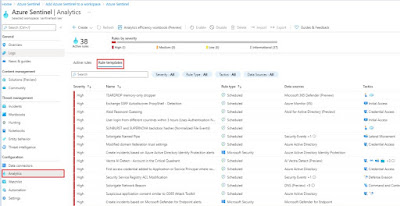
Rule templates can
be deployed as Azure Sentinel scheduled alerts in the Azure Sentinel portal.
These are fully customizable for use cases that extend beyond out-of-the-box
detections.
It is recommended
to avoid the temptation to enable too many at once, though, in that false
positives are possible. In those cases, review the alert rule criteria and its
triggering criteria to find how to tune the rule so that the detection results
match original expectations. Continue to enable more rules, in controlled batches,
over the course of the deployment.
All alert rules
deployments should be included in regular reviews of their value and
adjustments necessary to make them more relevant to the organization.
As a cloud-based
solution, Azure Sentinel provides frequent access to new content, and the alert
rule deployment and tuning lifecycle should match the dynamics of your threat
landscape. A weekly review is frequently recommended during the initial
deployment, followed by monthly reviews as the environment enters a more stable
state.
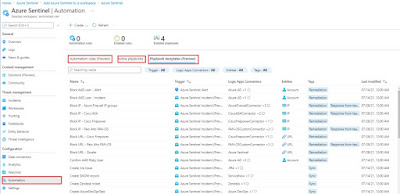
3. Playbooks
A playbook
is a collection of procedures that can be run from Azure Sentinel in response
to an alert. A security playbook can help automate and orchestrate your response
and can be run manually or set to run automatically when specific alerts are
triggered. Security playbooks in Azure Sentinel are based on Azure Logic Apps,
which means that you get all the power, customizability, and built-in templates
of Logic Apps.
There are
many playbook templates available in Azure Sentinel. You can either utilize it or
create your own custom playbook.
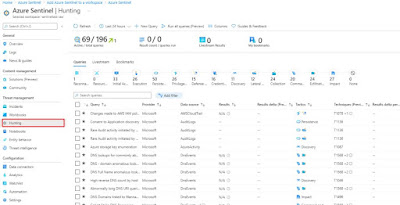
4. Hunting
Azure Sentinel Hunting is based on KUSTO queries
tailored to match a variety of use-cases. It also allows for manual, proactive
investigations into possible security threats based on the ingested data as
well as retroactive pursuits of attacks and root cause analysis. Hunting
consists of several capabilities:
·
Queries: Microsoft provided several built-in queries and
custom queries can also be created. Once a query is created you can convert it
into an analytic rule to run on a schedule.
·
Bookmarks: Lets you save items discovered across queries,
workbooks, and other activities for later investigations or incidents
·
Livestream: Live, interactive sessions that uses queries and
provides results in real time as they occur
·
Notebooks: Provides guided step-by-step hunting and
investigation workflows that can be reused
Queries are based on Kusto Query language (KQL). These can be very simple
queries to extremely complex, specific use case scenarios. To get started
in Azure Sentinel,
1.
Go to Hunting (as shown in above screenshot)
2.
You can run one or all the built-in queries or
click New Query to create a new custom query.
When
building a query, if you are not familiar with the data types available in
Azure Sentinel, you can use the left side of the page to view the available
tables and filters to assist with creating the correct query. While
typing, you are provided an ISE-like experience to help define your query.
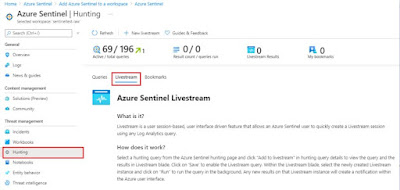
Livestream
While
queries help discover activity that has already occurred and ingested, hunting
using livestream allows you to create an interactive session and actively run
queries to find any activities you are searching for, malicious or not.
When an alert occurs, you will receive an Azure Portal notification. Each
session can also be used to create an analytic alert rule by clicking Elevate
to alert.
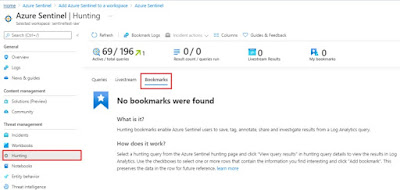
Bookmarks
Bookmarks
enable Azure Sentinel users to save, tag, annotate, share and investigate
results from a Log Analytics query.
You can select
a hunting query from the Azure Sentinel hunting page and click "View query
results" in hunting query details to view the results in Log Analytics.
Use the checkboxes to select one or more rows that contain the information you
find interesting and click "Add bookmark". This preserves the data in
the row for future reference
Hunting can
be a powerful way to provide valuable insights across all your organization’s
data sources. Microsoft has provided numerous built-in capabilities with
over 196 default hunting queries and 100’s of example queries within Log
Analytics Queries.
As you can see, something as ‘simple’ as an Azure Sentinel in the cloud for security purpose define its purpose completely. This has been a rather long post to outline features and capabilities of Azure Sentinel including its implementation over traditional SIEM and SOAR solutions. I hope I’ve done enough to outline the key points for consideration design and implementation. Enjoy!
References:
https://docs.microsoft.com/en-us/azure/sentinel/overview
https://github.com/Azure/Azure-Sentinel
Comments
Post a Comment